Integrations >
Wordpress
WordPress powers over 40% of all websites, making it the world's most popular content management system. As your WordPress site grows and attracts more visitors, managing customer interactions and support inquiries can become increasingly challenging for your team.
Adding an AI chatbot to your WordPress site isn't just about modernizing your website – it's about creating an efficient, responsive experience that serves your visitors 24/7. With automated responses and intelligent conversation handling, you can ensure every visitor receives immediate attention while maintaining the professional presence your WordPress site delivers.
What is SMBotify?
SMBotify is a no-code AI chatbot solution that automatically learns from your website content, knowledge base, and business documents. Once installed, it instantly begins providing accurate, personalized responses to your customers' questions, requiring no technical expertise or constant maintenance on your part.
By adding SMBotify to your WordPress site, you'll provide instant, around-the-clock assistance to your visitors while maintaining your site's professional appearance. The chatbot naturally handles everything from basic inquiries to detailed questions about your content and services, all while communicating fluently in over 50 languages.
How to Add a Chatbot to Wordpress Site?
This tutorial assumes that you have already created a SMBotify account and have set up your chatbot.
Method 1: Using a plugin
1. Go to your SMBotify account.
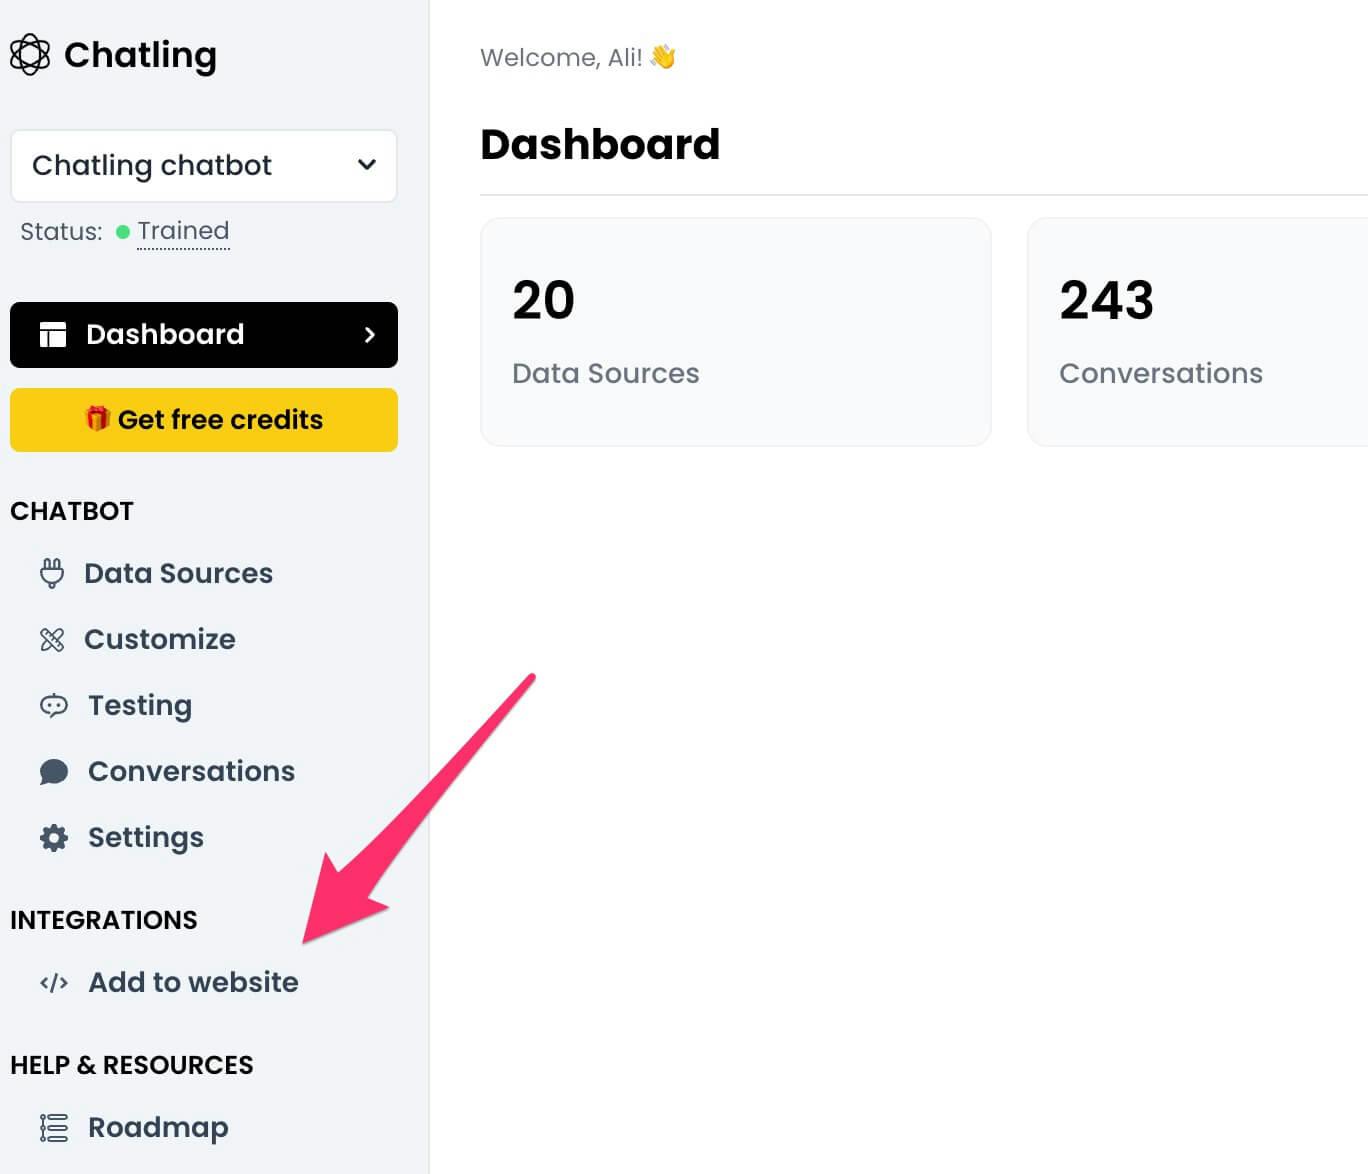
2. From the menu, click on Add to website.
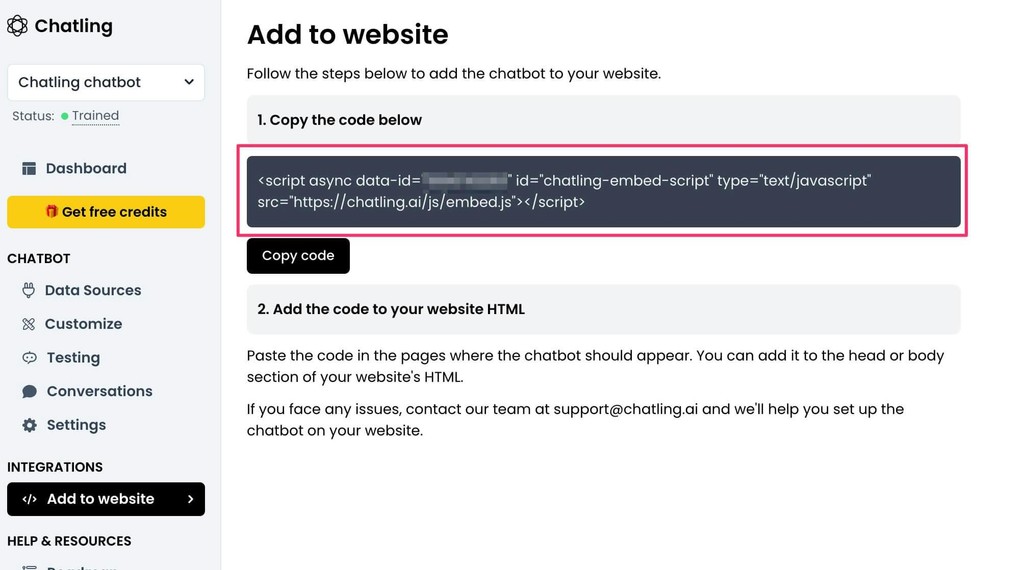
3. Copy the embed code.
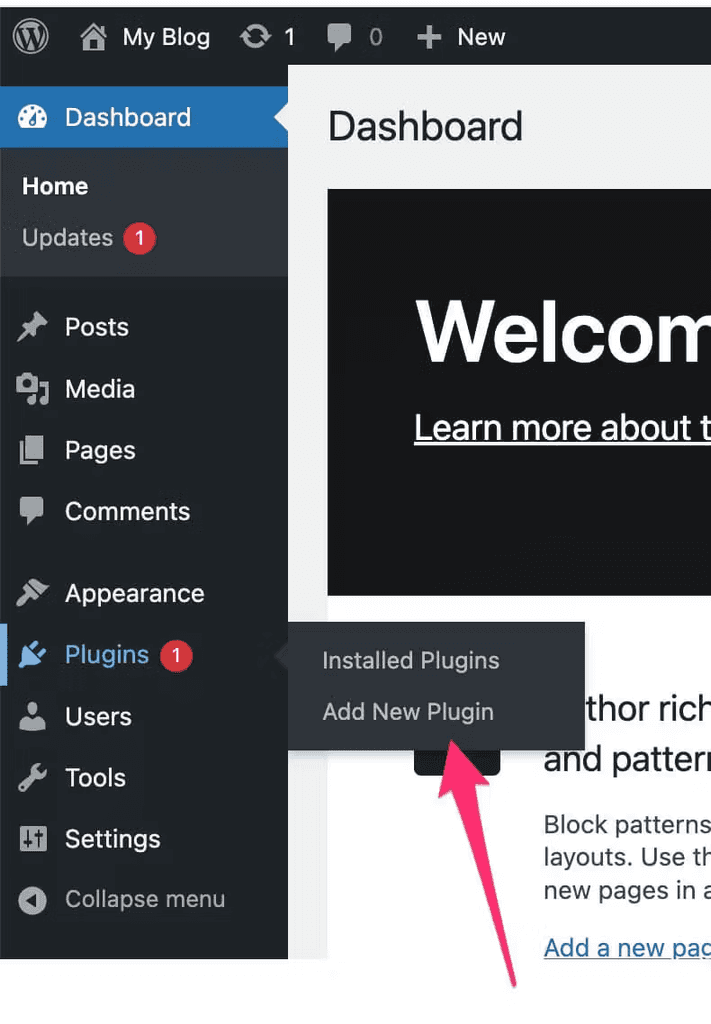
4. Open your WordPress dashboard and go to Plugins > Add new plugin.
5. Search for the "Insert Headers And Footers" plugin and install the one by WPBrigade.
6. Once installed, activate the plugin.
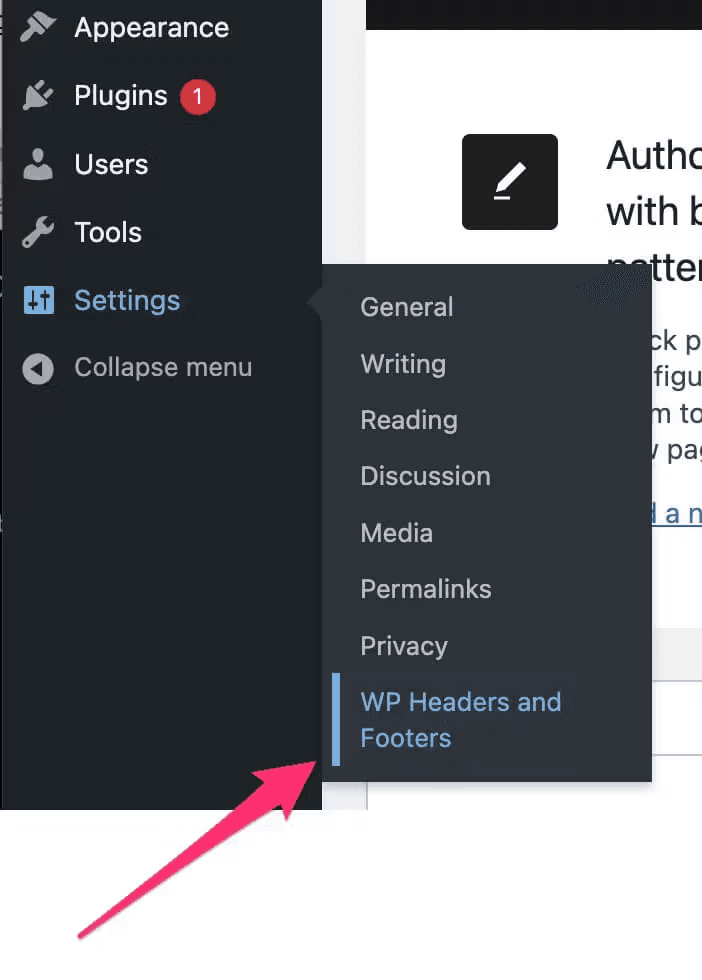
7. Go to Settings > WP Headers and Footers from the sidebar.
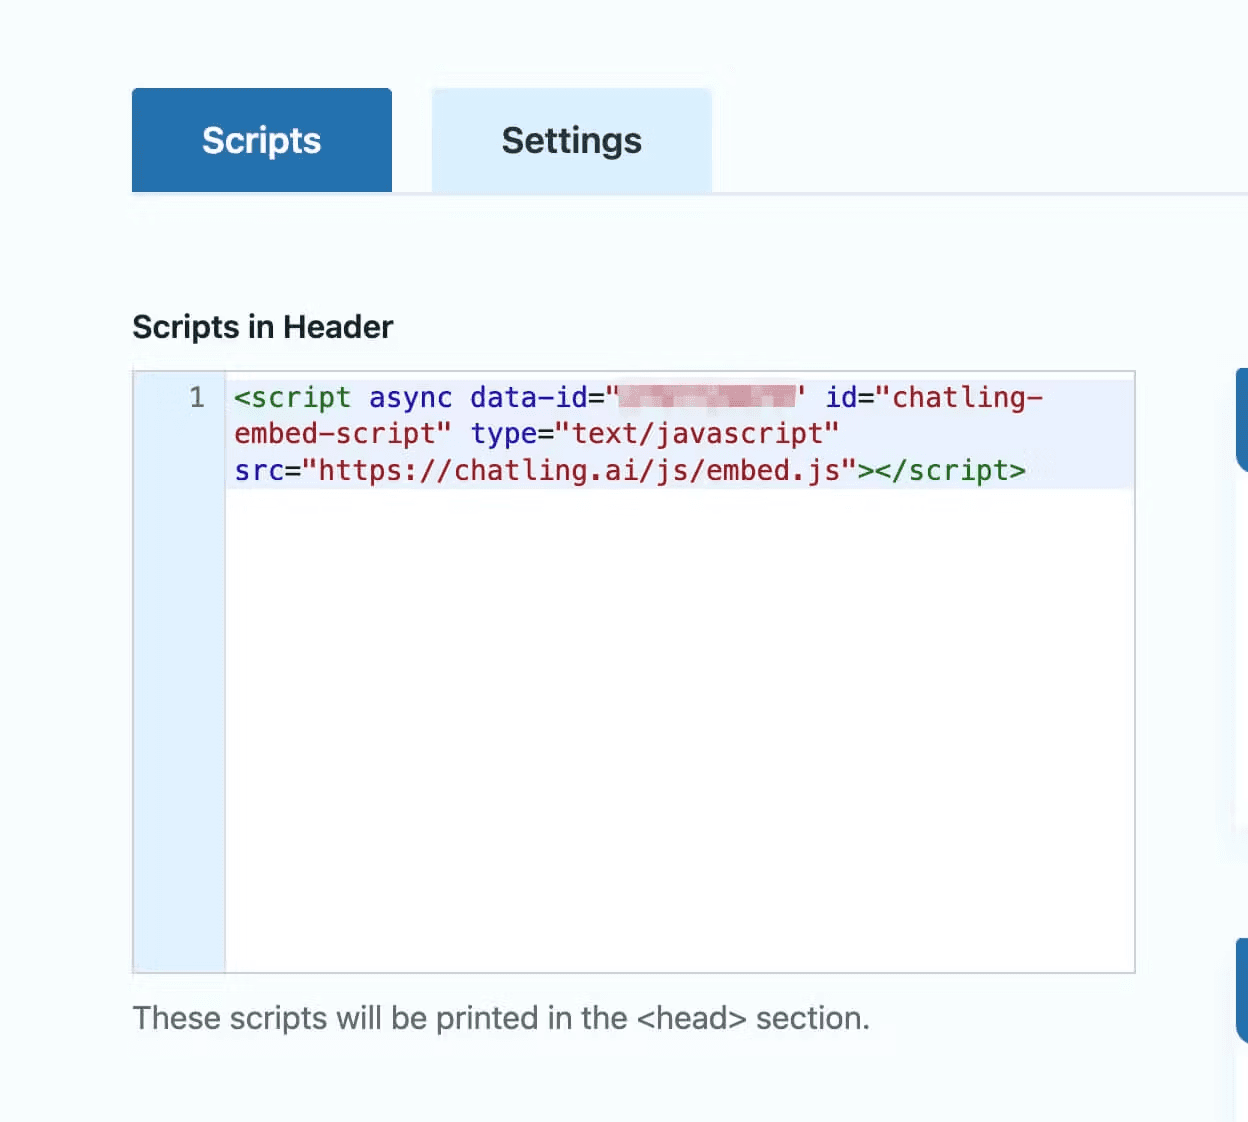
8. Paste the chatbot widget code in the header section and click Save Changes.
Publish your website to make the changes live.
Method 2: Using the theme editor
1. Open your WordPress dashboard.
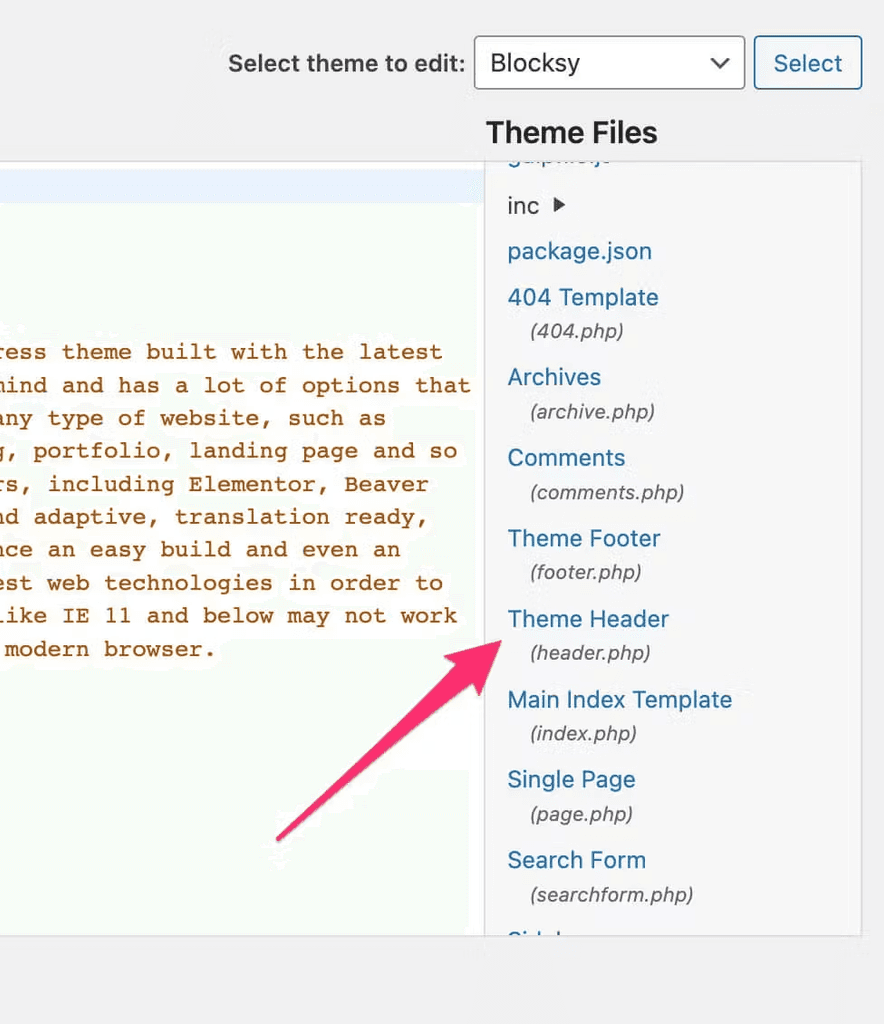
2. From the sidebar menu, select Appearance > Theme File Editor.
3. Under the "Theme Files" section (right side of the screen), search and open the header.php file.
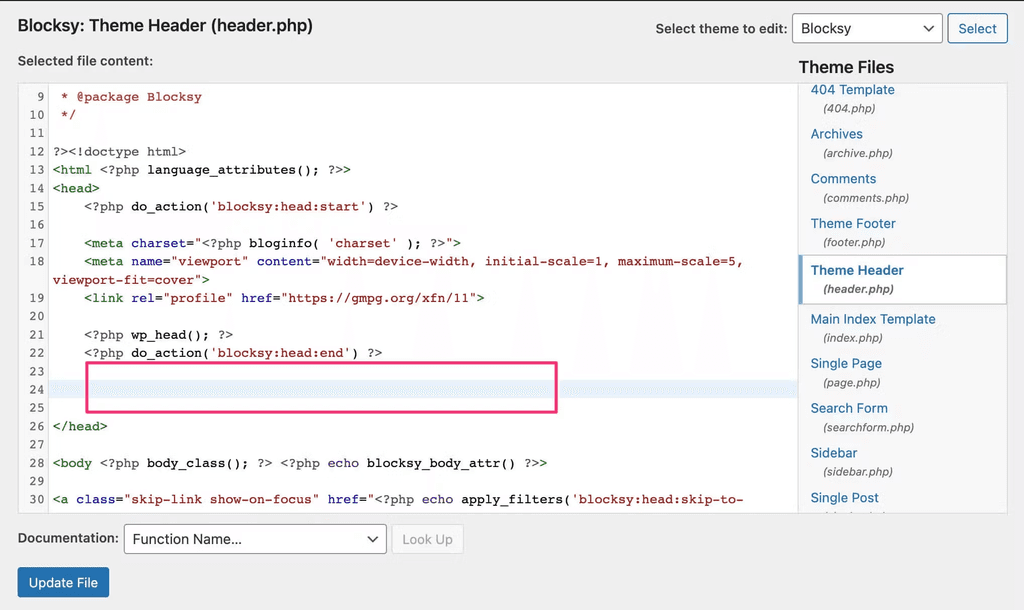
4. Paste the chatbot widget code before the closing </head> tag.
5. Click Update file to save.
The chatbot is now live on your website and will be visible to visitors.
How to add to Elementor
If your website is built using Elementor, you can read this tutorial to learn how to add the chatbot widget code to your website's header.
Why Use Chatbots for WordPress?
Providing exceptional visitor engagement and support is crucial for the success of your WordPress website. Chatbots can help you achieve that by offering the following benefits:
Enhance Website Interaction and User Experience
Chatbots offer instant and automated support, handling visitor queries and ensuring prompt assistance. By offering quick and personalized responses, they improve user engagement and create an interactive website experience that keeps visitors coming back.
24/7 Availability
Chatbots provide round-the-clock support, ensuring visitors can receive assistance anytime, regardless of location or time zone. With 24/7 availability, chatbots maintain continuous engagement and provide consistent support even when your team is unavailable.
Increased Conversions
Your potential readers, customers, or clients can receive immediate responses to their questions, which reduces bounce rates and increases the likelihood of conversion. This timely interaction helps prevent losing interested visitors due to delayed or missing responses, ultimately helping you achieve your website's goals, whether it's growing your readership, generating leads, or making sales.

